Create a letter
Creating an interactive or non-interactive document begins on the Correspondence panel.
-
Search for and open a member, dependent, employer, claim, or service provider record. At the bottom of the session pane, you'll see the
Correspondencetab.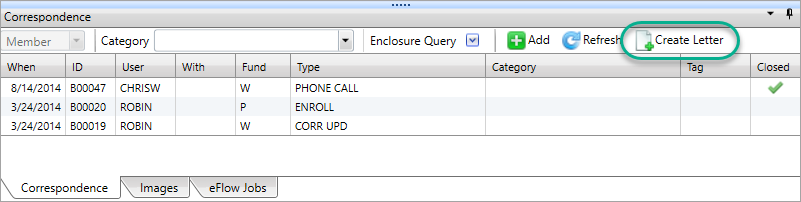
-
Click
 to display the
 Create Letterwindow.Note: If the Create Letter icon isn't displaying, you might not have permission to see it. Contact your local administrator for assistance.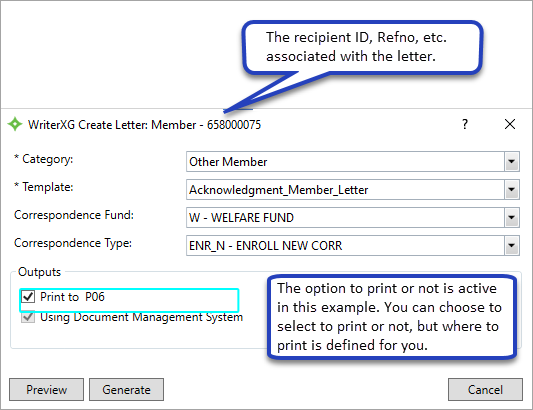
 Create letter window field descriptions
Any field with an asterisk * next to it or a red border around it must be completed before you can continue.
Option Type Description Category * list Group the templates as defined by the administrator, and can include a combination of batch, interactive, and non-interactive templates (e.g. Assets, Claims, Disability, Year End, Other, etc.).
Template * list This is the name of the template. Correspondence Fund list The fund
A plan's asset pool held in trust for the benefit of union members and their families. The fund is the foundation of the basys system. Fund type examples include, welfare, pension, annuity and political action. associated to the recipient's correspondence (document). This is how it will be recorded in the Correspondence panelif you have a document management system.Correspondence Type list If you select a Correspondence Fund, the Correspondence Type is required.
- This is the communication type related to the Correspondence Fund.
- If the template was set up with an associated Correspondence Type, it displays in the list. The type displays in the Correspondence tab
Typecolumn. Examples include, PEN ALERT, Phone Call, CORR Update, etc.
Outputs the defined document output types for each template. Print To check box - The printout goes to the designated network printer setup by the administrator. The printer name displays.
- You can only select or clear the print check box if the administrator enabled it.
- If you have documents you send to the third-party vendor RedCard for printing,
RedCarddisplays inPrint To. You won't be able to change this option.- Printing to RedCard is only available if you have a document management system.
- All documents with
Print ToRedCardare sent to your contracted RedCard provider on a schedule configured at setup.
Using Document Management System check box The PDF
A file format designed to present documents the same way on different devices. Typically, PDFs are not editable. output is stored in your document storage system and can be retrieved when needed.- If you have a document management system (e.g. PaperVision, OnBase, etc.) this option is checked and can't be changed.
Next action options Preview button If this button is active, click it to display the letter preview in your browser. Generate button If this button is active, click it to generate the letter in PDF A file format designed to present documents the same way on different devices. Typically, PDFs are not editable. format. You won't be able to make any changes to the letter.Cancel button Select this button to close the Create Letterwindow.Any field with an asterisk * next to it or a red border around it must be completed before you can continue.
- Select a
Category. The options in the list depend on the document types, the session type, and your fund and role access.Note: WriterXG is customizable and the administrator determines how outputs, templates, and permissions are set up. Your categories, templates, and outputs might look different than these examples. - Select a
Template. This is the actual name of the template. The templates in the list depend on theCategory. - A
Correspondence FundandCorrespondence Typedisplay if the administrator added them. You can change the default or if a Correspondence Fund doesn't display, you can select one.- If you select a Correspondence Fund, the
Correspondence Typebecomes required. The
Correspondence Typeoptions in the list depend on the correspondence fund. The type indicates the kind of interaction with the recipient. Examples could include Corr Update, Pen Alert and Enroll.Important! Correspondence entries won't be created or updated unless you have a document management center.
- If you select a Correspondence Fund, the
- The
Outputsarea displays where the result is generated. Each template has its own settings which could include, printing to a network printer or saving the document to a specified location. The selections can't be changed unless configured.- If the
Print tocheck box is available, the administrator turned it on and you'll be able to check or clear it, meaning you can choose to print or not, but you won't be able to change where a document prints. If the print check box is checked and you can't change it, the administrator set it up to always print or the document is for a MemberXG member that hasn’t opted into GoGreen. If you have documents you send to the third-party vendor RedCard for printing,
RedCarddisplays forPrint To. You won't be able to change this. Printing to RedCard is only available if you have a document management system.If you have a document management system (e.g. PaperVision, OnBase, etc.), the
Using Document Management Systemcheck box is selected by default and you won't be able to change it.- If there is a printer ID for a MemberXG member’s document that hasn’t selected to GoGreen, the document will always print and you can’t change it.
- If the
- Depending on the template, the document will contain standard unchangeable information (non-interactive) or there could be data selections (interactive). Choose one of the following instructions.

A non-interactive document has the necessary information and doesn't require any additional information. You won't be able to change or add anything to the document.
- After making your template selections, choose to:
- Click
Generateto create the document without previewing it and display a message indicating the document was generated. -
If you would like to preview the document, click
Previewon theCreate Letterwindow and the PDF A file format designed to present documents the same way on different devices. Typically, PDFs are not editable. document displays in a separate window. 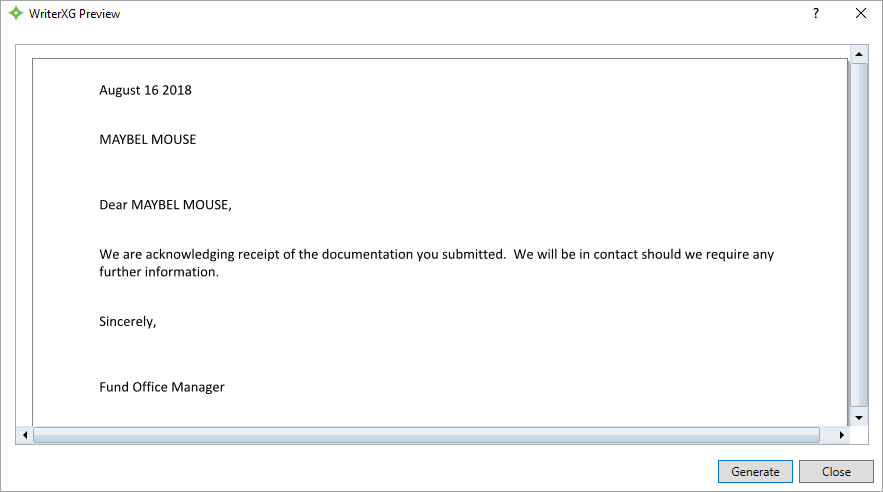
- Click
Generateto create the document and display a message indicating the document was generated, or clickCloseto close the preview window without producing the document. - When you're finished, click
Cancelto close the WriterXG Create Letter window. - If you're using a document management center and the template was configured for a correspondence, go to the Correspondence pane and click
 to see the record.
OR
When creating an interactive document, you can preview a document (letter, statement, form, etc.) that includes basys session data and, depending on the template, you can select the letter topic or add personalized content.
-
After making your template selections, click
Previewto open the interactive preview web page in your browser.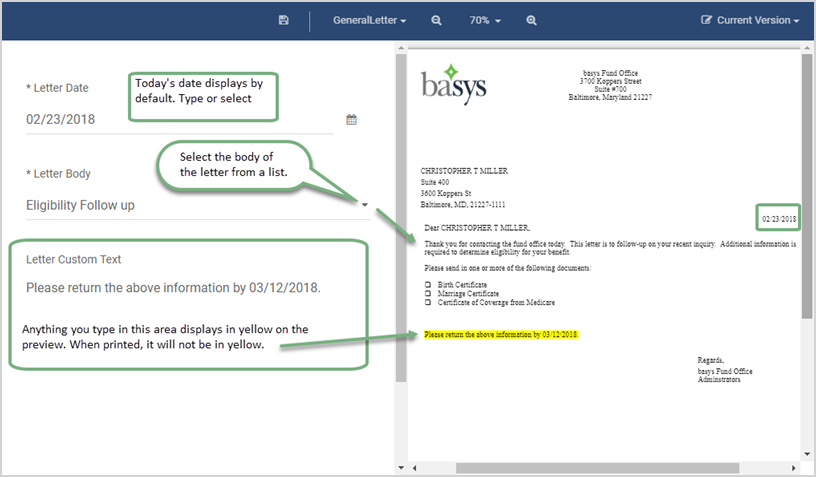
Any field with an asterisk * next to it or a red border around it must be completed before you can continue.
- The left-side of the window displays the options you can change.
- The right-side displays an interactive view of the letter. As you make selections in the left-hand side, the document preview updates (on the right side). Change the view with the scroll bars.
- The
Letter Datedisplays the current date. If you need to change the date, type the date in dd/mm/yyyy format or click to select a date.
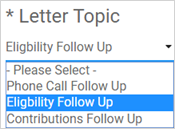
 - Depending on the template, a
Letter Topiclist displays options based on the letter and session. Select what you would like to display in the letter body. -
You might have the option of typing text a
Letter Custom Textor anAdditional Informationarea. In our example we asked for a return date.The information is highlighted in the letter body so you can easily see it. Make sure to review it for any errors. Once the letter is saved, printed, or sent, the yellow highlight isn't visible.
Note: You can only add text. For example, if you try to add a formatted table, the text will display without any formatting. You can't add any images.
-
Review the letter. If no changes are needed, click the generate button in the lower-left-half of the page and the preview page updates with a PDF
A file format designed to present documents the same way on different devices. Typically, PDFs are not editable. letter version.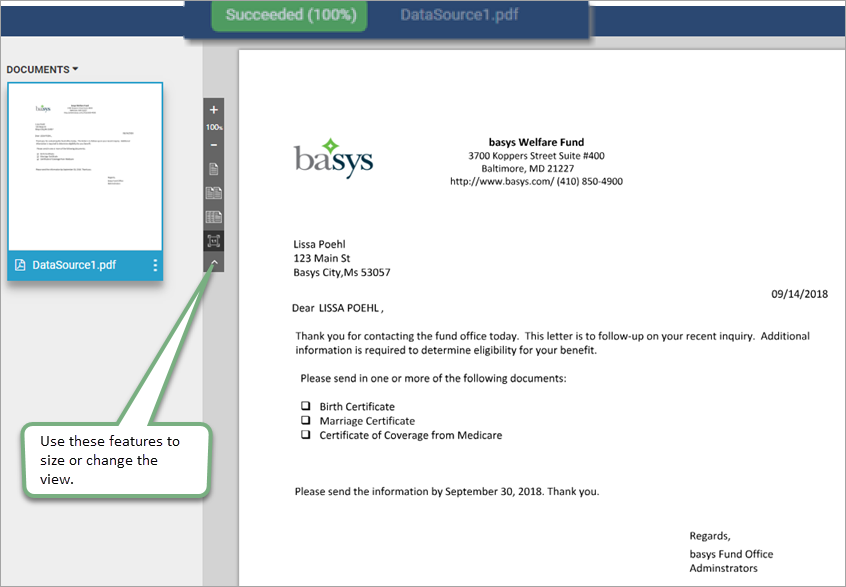
- A message at the top of the page alerts you to the success or failure of the letter generation and the file name displays. When you're done with the PDF file, close the web page.
- When you're done with the PDF file, close the web page and click
Cancelto close the WriterXG Create Letter window. - If you're using a document management center and the template was configured for a correspondence, go to the Correspondence pane and click to see the record.